
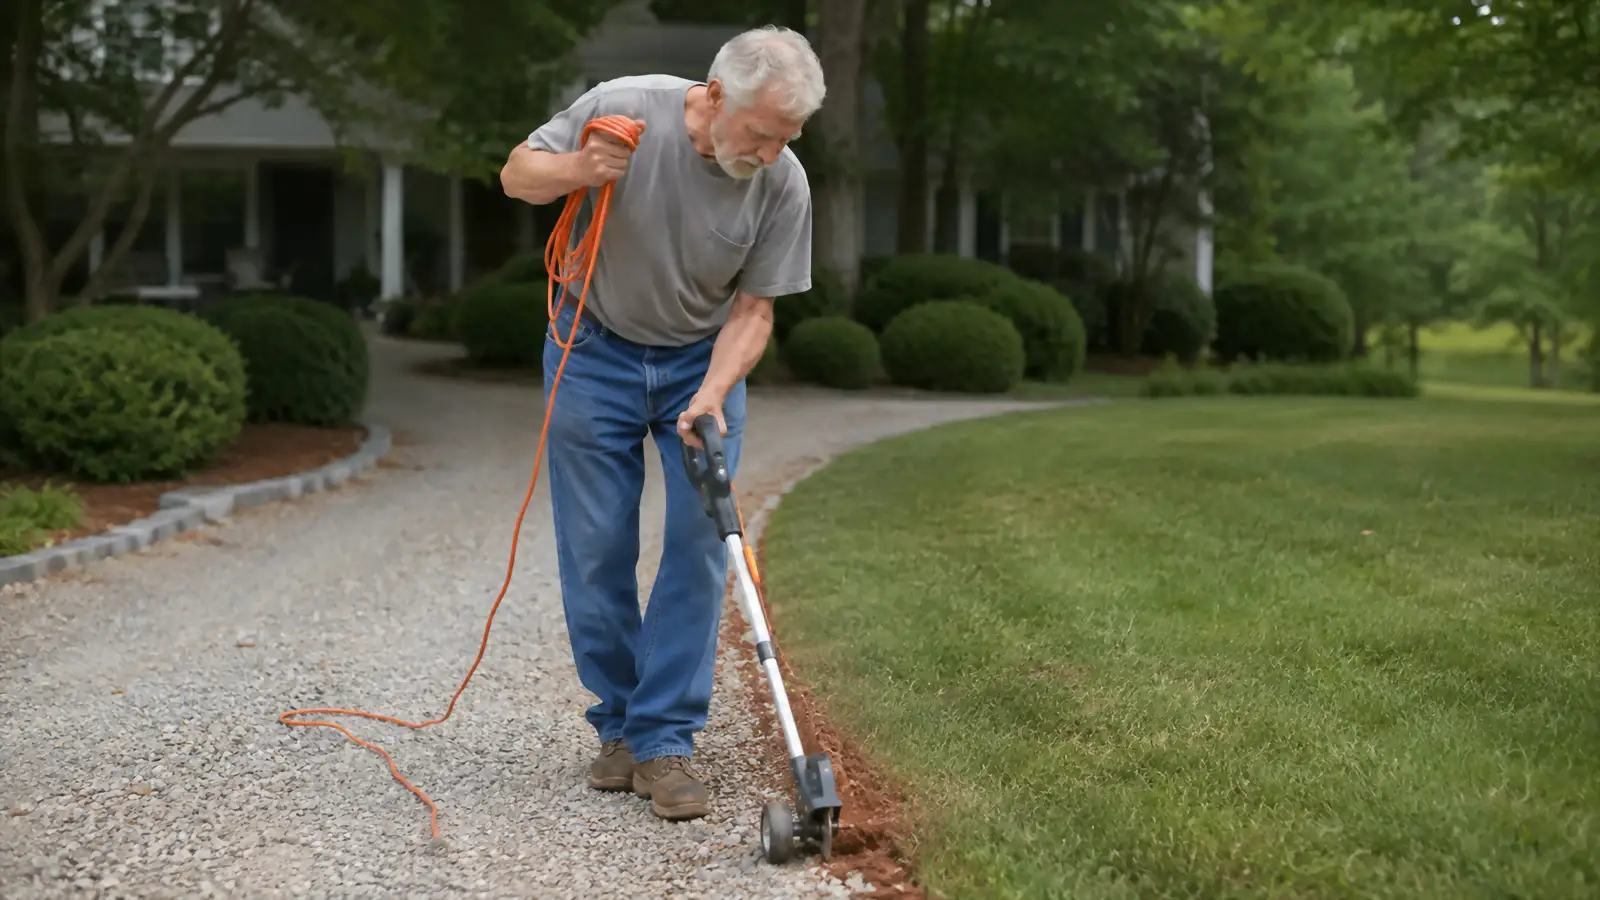
The difference between a yard that looks kept up and one that looks merely mowed usually comes down to one thing: the edge. I learned that the hard way after years of mowing my half-acre outside Burlington, North Carolina and wondering why it never looked as sharp as my neighbor's, even though my grass was cut just as short. He was edging every couple of weeks. I wasn't. Once I started using my BLACK+DECKER string trimmer's edger mode along the drive and around the two raised beds Delia and I built back in 2019, that gap closed fast, and it took a lot less effort than I expected. It's a habit now, not a chore, and it's changed how the whole property reads from the road.
This isn't complicated work, but it is technique-dependent, and the difference between a ragged, wandering line and a crisp one that looks like a landscaping crew did it comes down to a handful of habits. I'll walk through the method I use, start to finish, including the parts I got wrong before I got them right.
Want an Edger That's Already Built Into Your Trimmer?
I use my BLACK+DECKER 14-inch trimmer for this whole job, no separate half-moon edger needed. Rotate the head, and it's an edger. See today's price and the current rating on Amazon.
Amazon Check Today's Price on Amazon →Step 1: Mow First, Then Edge
Always mow before you edge, never the other way around. If you edge first and then mow, the mower throws clippings right back into your freshly cut line and buries the work you just did. I mow the whole half-acre, bag or mulch as usual, and only after the mower is back in the shed do I bring out the BLACK+DECKER trimmer.
Mowing first also means the grass along the edge is already short, so the trimmer isn't fighting through tall growth on top of cutting a line. It's just cleaning up the strip the mower deck couldn't reach, the last inch or two right against the driveway, the walkway, or the bed borders.
I've tried it the other way around exactly once, edging a fresh line and then mowing an hour later once the grass had dried some, and I still ended up sweeping clumps of clipped grass out of the cut. It's not worth the shortcut. Mow, let the yard settle for a few minutes, then bring out the trimmer and finish it off.
Step 2: Rotate the Head to Edger Mode and Sort Out Your Cord
The BLACK+DECKER trimmer I use is a 2 in 1 tool, meaning the head rotates from horizontal trimming position to vertical edging position without any tools. I flip a release, turn the head ninety degrees, and lock it back in. It takes about fifteen seconds, and I've never had it slip out of position mid-job on me.
Because mine is a corded 6.5-amp model and not a battery trimmer, this is also the point where I deal with the extension cord, and it's worth taking seriously rather than treating as an afterthought. I run a hundred-foot cord from the outlet by my shed, and before I start cutting I walk the route I'm about to edge and lay the cord along the lawn side of the line, never the driveway or bed side, so it isn't dragging across gravel or catching on the raised bed corners. I loop the trimmer's own cord retention hook through the extension cord connection first, so a tug on the cord doesn't yank the plug loose mid-line. Then I drape a long loop of slack over one shoulder as I walk, feeding it out as I go instead of leaving a big pile at my feet that I'll trip over three steps later.
It sounds like a small detail, but a cord that's fighting you is the single biggest thing that turns a clean edging pass into a crooked one. Get it sorted before you start cutting, not while you're halfway down the drive.
Step 3: Start at a Hard Edge and Keep the Line Vertical
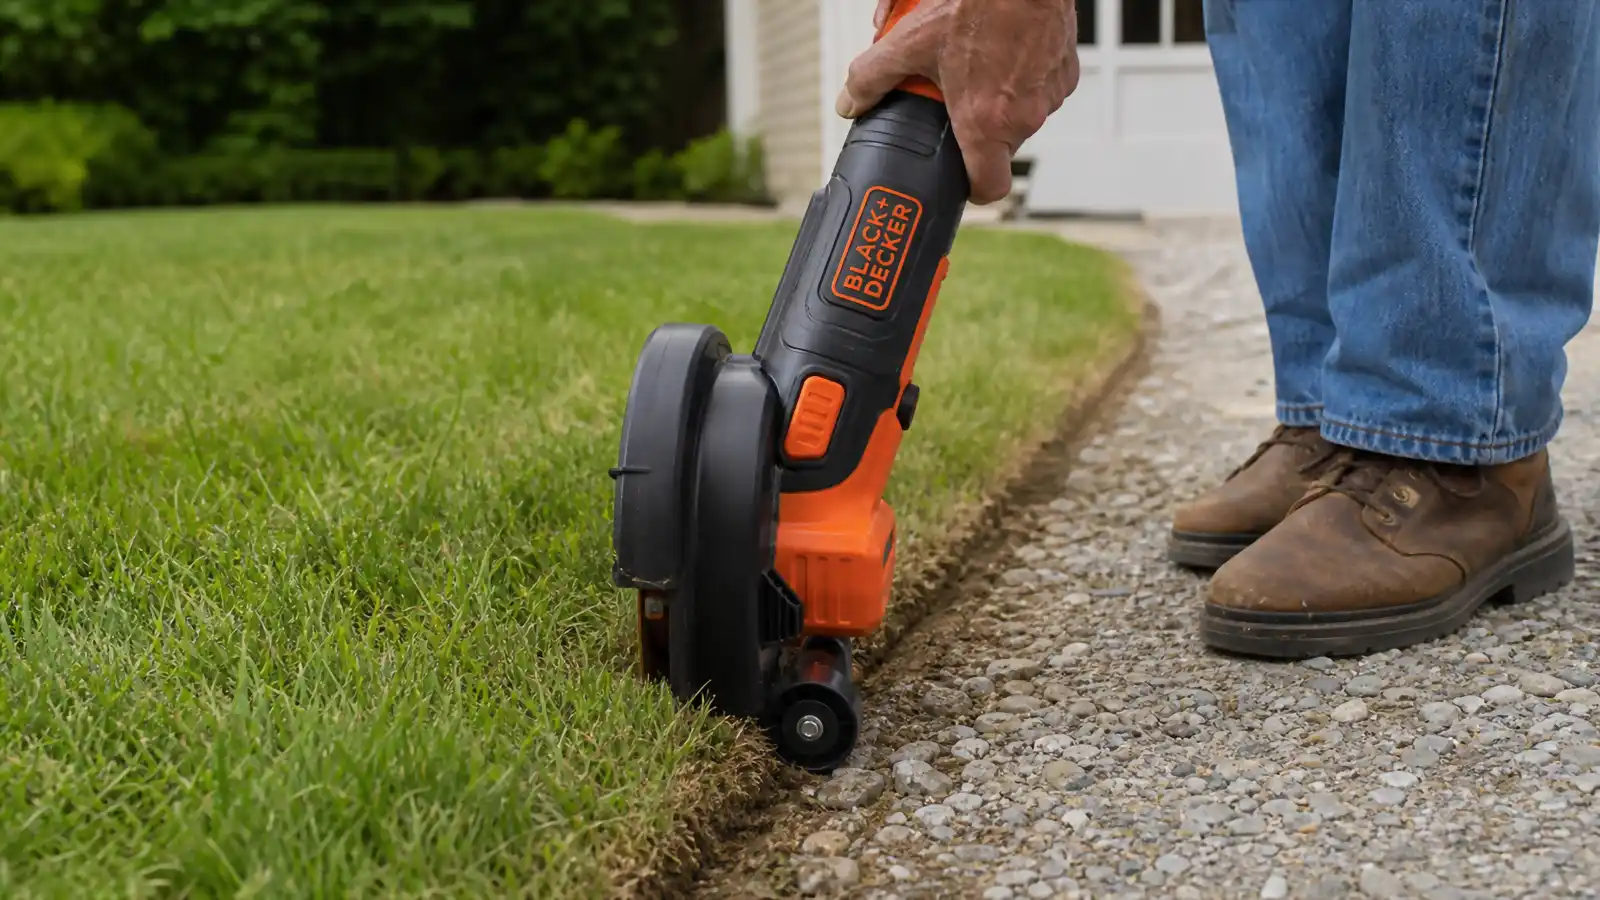
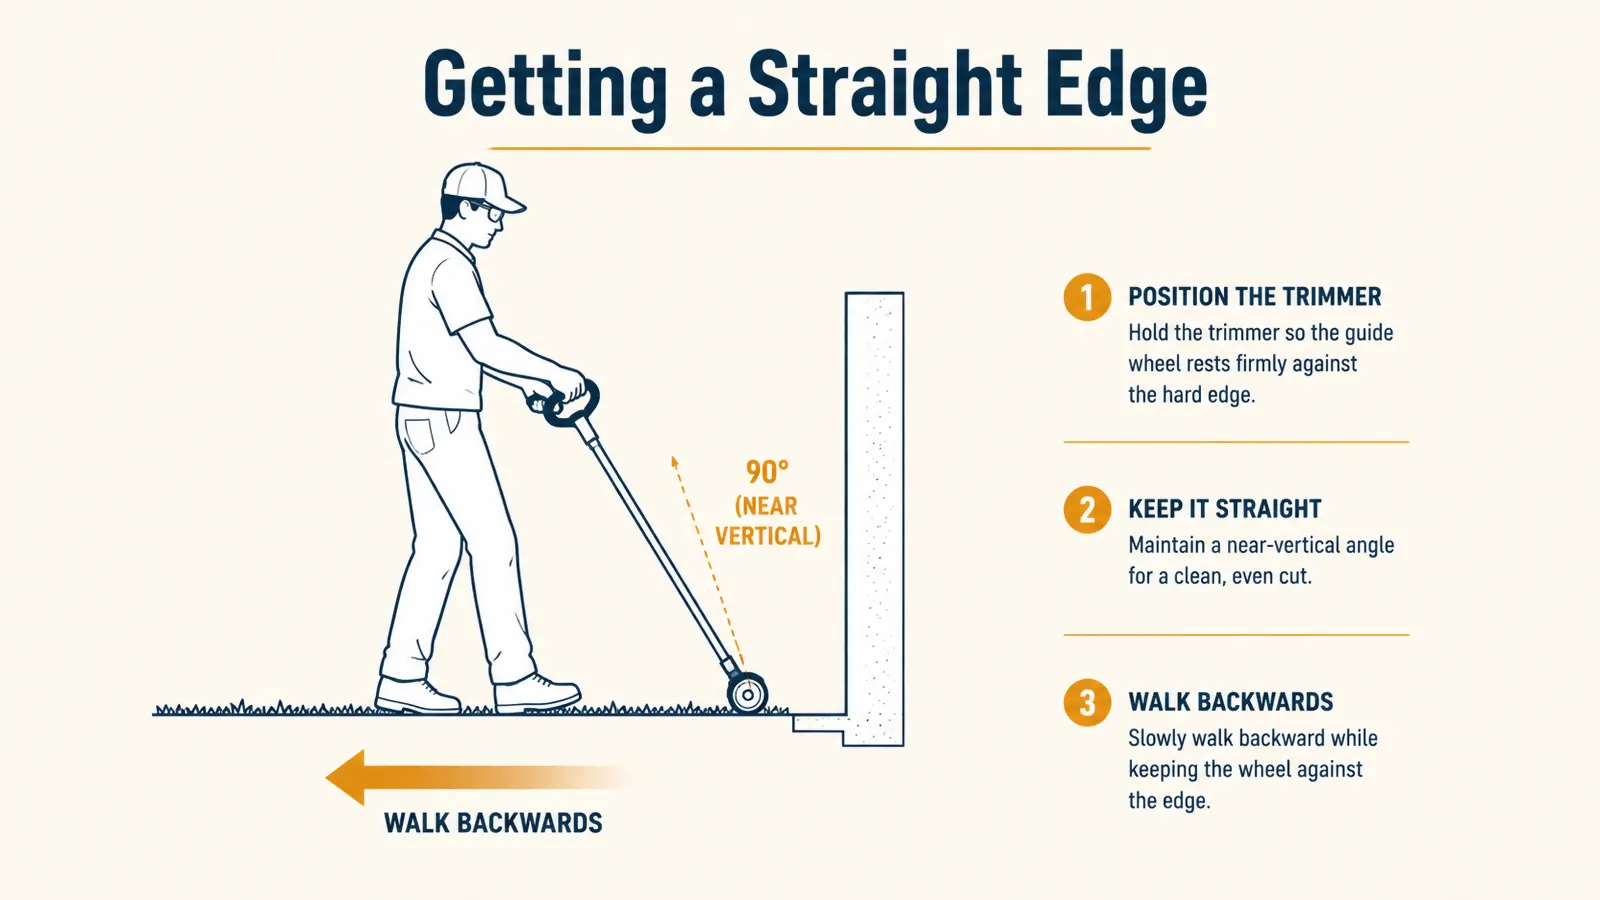
I always start where I have a hard edge to follow, my gravel driveway, since a fixed reference makes it far easier to cut straight than trying to eyeball a line across open grass. The guide wheel on the BLACK+DECKER's edger head rides right along the lip of the gravel, and as long as I keep that wheel in contact with the hard surface, the cutting line stays consistent without me having to think about it too hard.
The trimmer needs to stay close to vertical, blade pointed straight down into the grass, not angled out toward the lawn or tipped in toward the gravel. If you tip it toward the lawn, you'll cut a wide, sloppy trench. If you tip it toward the gravel, you'll barely nick the grass and have nothing to show for the pass. I aim for just barely into the turf, cutting a thin vertical slice rather than trying to carve out a deep trench. A shallow, clean cut done every couple of weeks looks better in the end than one deep gouge done once. I've learned to trust that guide wheel more than my own eye, since my eye drifts long before the wheel does.
Not every edge I cut has a hard border to guide off of. The wooden frames of the two raised beds give me one, and the gravel drive gives me another, but the border where lawn meets a mulched ring under the willow oak has no fixed edge at all. For that one I use the mulch line itself as my reference, and on the first pass of the season I'll set down a length of garden hose to mark where I want the new edge to sit, then follow it with the BLACK+DECKER until the line is established well enough that I don't need the hose again.
Step 4: Walk Backward at a Steady Pace, One Pass at a Time
This is the part most people get backward, literally. I walk backward along the line I'm cutting, not forward. Walking backward means I can see the cut I just made, which lets me correct my angle immediately if I've started to drift instead of discovering a wandering line only after I've gone thirty feet past it.
I keep a steady, unhurried pace, roughly the speed of a slow walk, and I don't try to take the whole trench in one pass. On the first pass I'm cutting a light line to establish the edge. If a section needs to go a little deeper because the grass has crept out further than usual, I'll go back over that stretch a second time rather than leaning hard into the first pass and risking an uneven cut. Two light passes beat one heavy one every time, especially on a slope, and the back corner of my lot has enough of a grade that rushing a single deep pass there is how you end up with a line that zigzags.
That back slope is also where I slow down the most, because footing matters as much as trimmer angle once the ground tilts. I plant each step before I let my attention go back to the cutting line, and I keep the cord looped high enough on my shoulder that it isn't catching on the grade behind me. At seventy-one I'd rather take a slope in short, careful passes than rush it and end up either off balance or with a line that wanders because I was watching my feet instead of the cut. Slower and careful beats fast and crooked every time, especially once the shadows get long and the light along that slope starts playing tricks on a straight line.
Step 5: Sweep the Clippings Before They Stain the Concrete
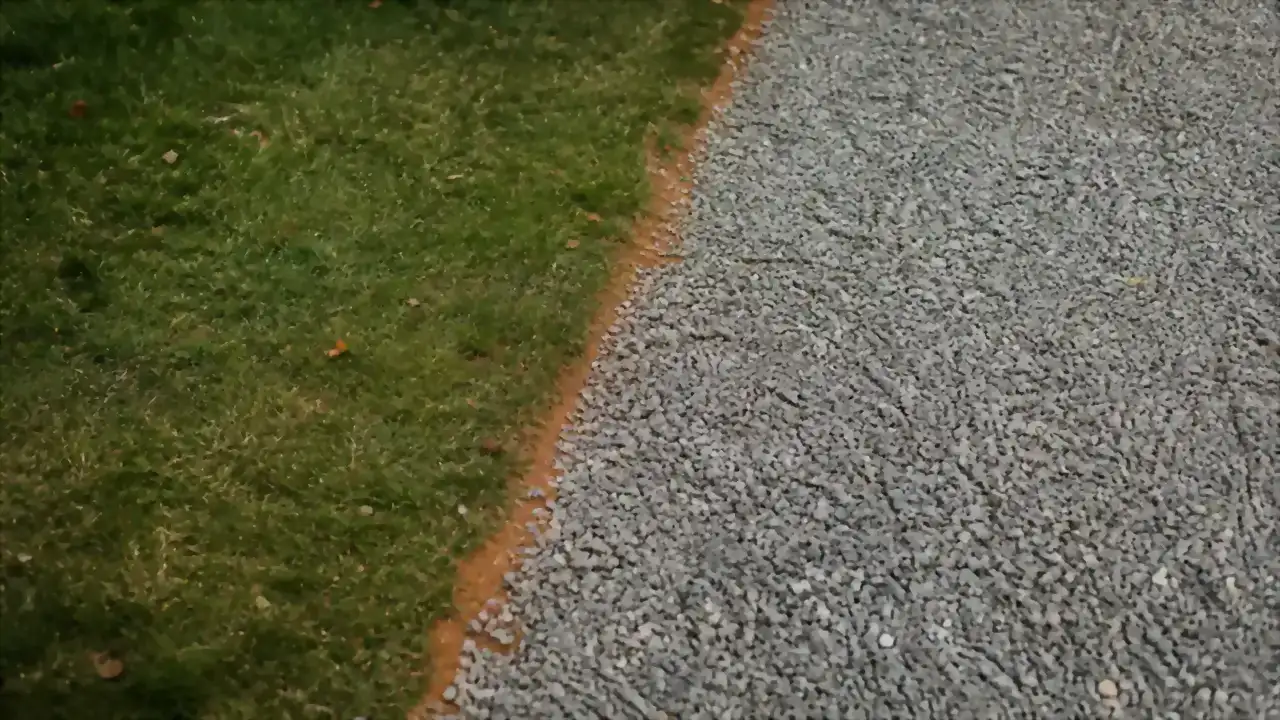
The last step is the one people skip, and it's the one that makes the whole job look finished or half-done. Fresh grass clippings sitting on a driveway or a walkway will leave a green stain if they sit through a dew or a rain before you deal with them, especially on lighter concrete. I sweep the clippings off the hard surface and back onto the lawn side the same day I edge, using a stiff push broom, not a leaf blower, since a blower just scatters them onto the neighbor's drive or back into the flower beds.
This takes maybe five minutes for my whole driveway and walkway combined, and it's the difference between the job reading as "done" versus "started and abandoned." I do it every time, no exceptions, right after I switch the BLACK+DECKER back off and set it down.
In a wetter stretch of spring, when I've had rain three days running and finally get a dry window to edge, I sweep twice, once right after cutting and again the next morning, because damp clippings tend to stick to gravel longer than dry ones do. It's a small extra step, but it saves scrubbing a green smear off the drive a week later.
What Else Helps
Touch it up every few weeks rather than letting it go and having to rebuild the whole edge each spring. Once you've established a clean line, maintaining it with a light pass every two to three weeks in growing season takes ten minutes. Let it go for two months and you're back to fighting overgrown runners and thick root mats that take real effort to cut through. I keep the BLACK+DECKER hanging on the pegboard in my shed specifically so grabbing it for a quick touch-up pass doesn't feel like a chore. I've found the touch-up pass takes less time than deciding whether to skip it, so I just do it on a set schedule instead of waiting until the edge looks bad.
Basic eye protection is worth having on for this job too, since a trimmer at ground level kicks up small debris right at eye height more than people expect. I lean on the same routine from March through November, mowing, edging, sweeping, and it's a lot less work spread across the season than it would be trying to catch it all up in one big push before Sawyer and June come over for a weekend and the yard is on display. For the fuller story of how this same trimmer has held up on the fence line and the beds over three seasons, I wrote about it in my long-term review of the BLACK+DECKER string trimmer, and if you want the short list of reasons it's stayed my go-to tool, I laid those out in 10 reasons this trimmer earns its spot in the shed. It's the kind of small, repeated effort that adds up to a yard that looks cared for year-round instead of one that gets a big push twice a year and coasts the rest of the time.
A clean edge isn't about a heavier tool or a deeper cut. It's about a hard reference line, a steady pace, and doing it often enough that you're never rebuilding it from scratch.
Ready to Skip the Separate Edging Tool Altogether?
The edger mode built into this BLACK+DECKER trimmer is what got me edging regularly instead of putting it off. Check today's price and the current rating on Amazon.
Amazon Check Today's Price on Amazon →